Let’s Get Started with ASHIRASE
If you would like to view a Quick Start Guide with images, please refer to the PDF manual via the link below.
Quick Start Guide
1. App Installation
Let’s start by installing the app using the steps below.
- Access the following link and download the ASHIRASE app: https://t.co/8DJTA8qEdz
- Once the ASHIRASE app is installed, tap “Open”.
- When the four pop-ups appear, select the following options:
- Allow “ASHIRASE” to use your location?: Select “Allow While Using App”
- “ASHIRASE” would like to send you notifications: Select “Allow”
- “ASHIRASE” would like to access your motion & Fitness activity: Select “Allow”
- Allow “ASHIRASE” to find Bluetooth devices?: Select “Allow”
- In the app’s display settings, select the text color.
- In the app’s display settings, select the text size.
- Tap “Next”.
- Tap “Create”.
- Enter the email address you want to register.
- Tap “Next”.
- Enter the password to register. Please enter a password of 8 characters or more, combining half-width alphabets and numbers.
- Tap “Next”.
- Check the terms of use and privacy policy, check the agreement box.
- Tap “Register”.
- When you receive the email, click the URL in the message to complete verification.
- Return to the app and tap the “Log In”.
- Register your profile.
- Complete the pre-use questionnaire.
2. Pairing and Attaching the device to your shoes
2-1. Pair the ASHIRASE2 device with the app
After logging into the app, please use the following steps to pair the device with the app.
- Ensure Bluetooth is enabled on your iPhone.
- Open the ASHIRASE app and tap “Open Device Register Screen” on the pop-up that says, “The ‘ASHIRASE device’ has not been registered. Please register the device.”
- Press and hold the power button on both ASHIRASE2 devices for about 8 seconds to enter pairing mode.
- The LED will flash white in pairing mode.
- The power button (which can be found on the bottom part of the device) is a push button, not a slide switch.
- Tap the “ASHIRASE Device” button that appears on the app screen.
- When the “Bluetooth Request” pop-up appears, tap “Pair” to register each device separately (left and right).
2-2. Attach the device to your shoes
ASHIRASE2 is a device that is used by inserting a vibrating belt inside your shoes. If it is not properly attached, it may cause damage, loss, or discomfort to your feet. Please make sure to follow the correct installation procedure.
- Check the Orientation of the Device
Look for the “L” (for the left foot) or “R” (for the right foot) marking in the center of the vibration belt. Hold the device with the short belt on the instep, the long belt on the heel side, and the belt aligned along the external lateral side. - Insert the Belt into the Shoe
Align the orientation and insert the entire vibrating belt into the shoe. - Check the Placement of the Belt
With the long belt placed at the internal heel of the shoe, the short belt should then be placed on top of the foot, just below the upper shoe area or just under the shoe tongue. - Attach the Clip of the Main Unit
Securely attach the clip near the lace holes of the shoe. The clip of the device should be placed on the external lateral side of the shoe. Attach the clip around the 10 o’clock position on the left foot and around the 2 o’clock position on the right foot. - Adjust the Position
Adjust the end of the heel-side belt so that it is centered on the heel. You can slide the external lateral-side belt forward to make this adjustment. Make sure the belt stands upright and does not lie flat on the insole.
We have provided reference images below for assistance during installation.
If someone with sight is available to help you, please refer to the images:
[Image showing heel-side position]
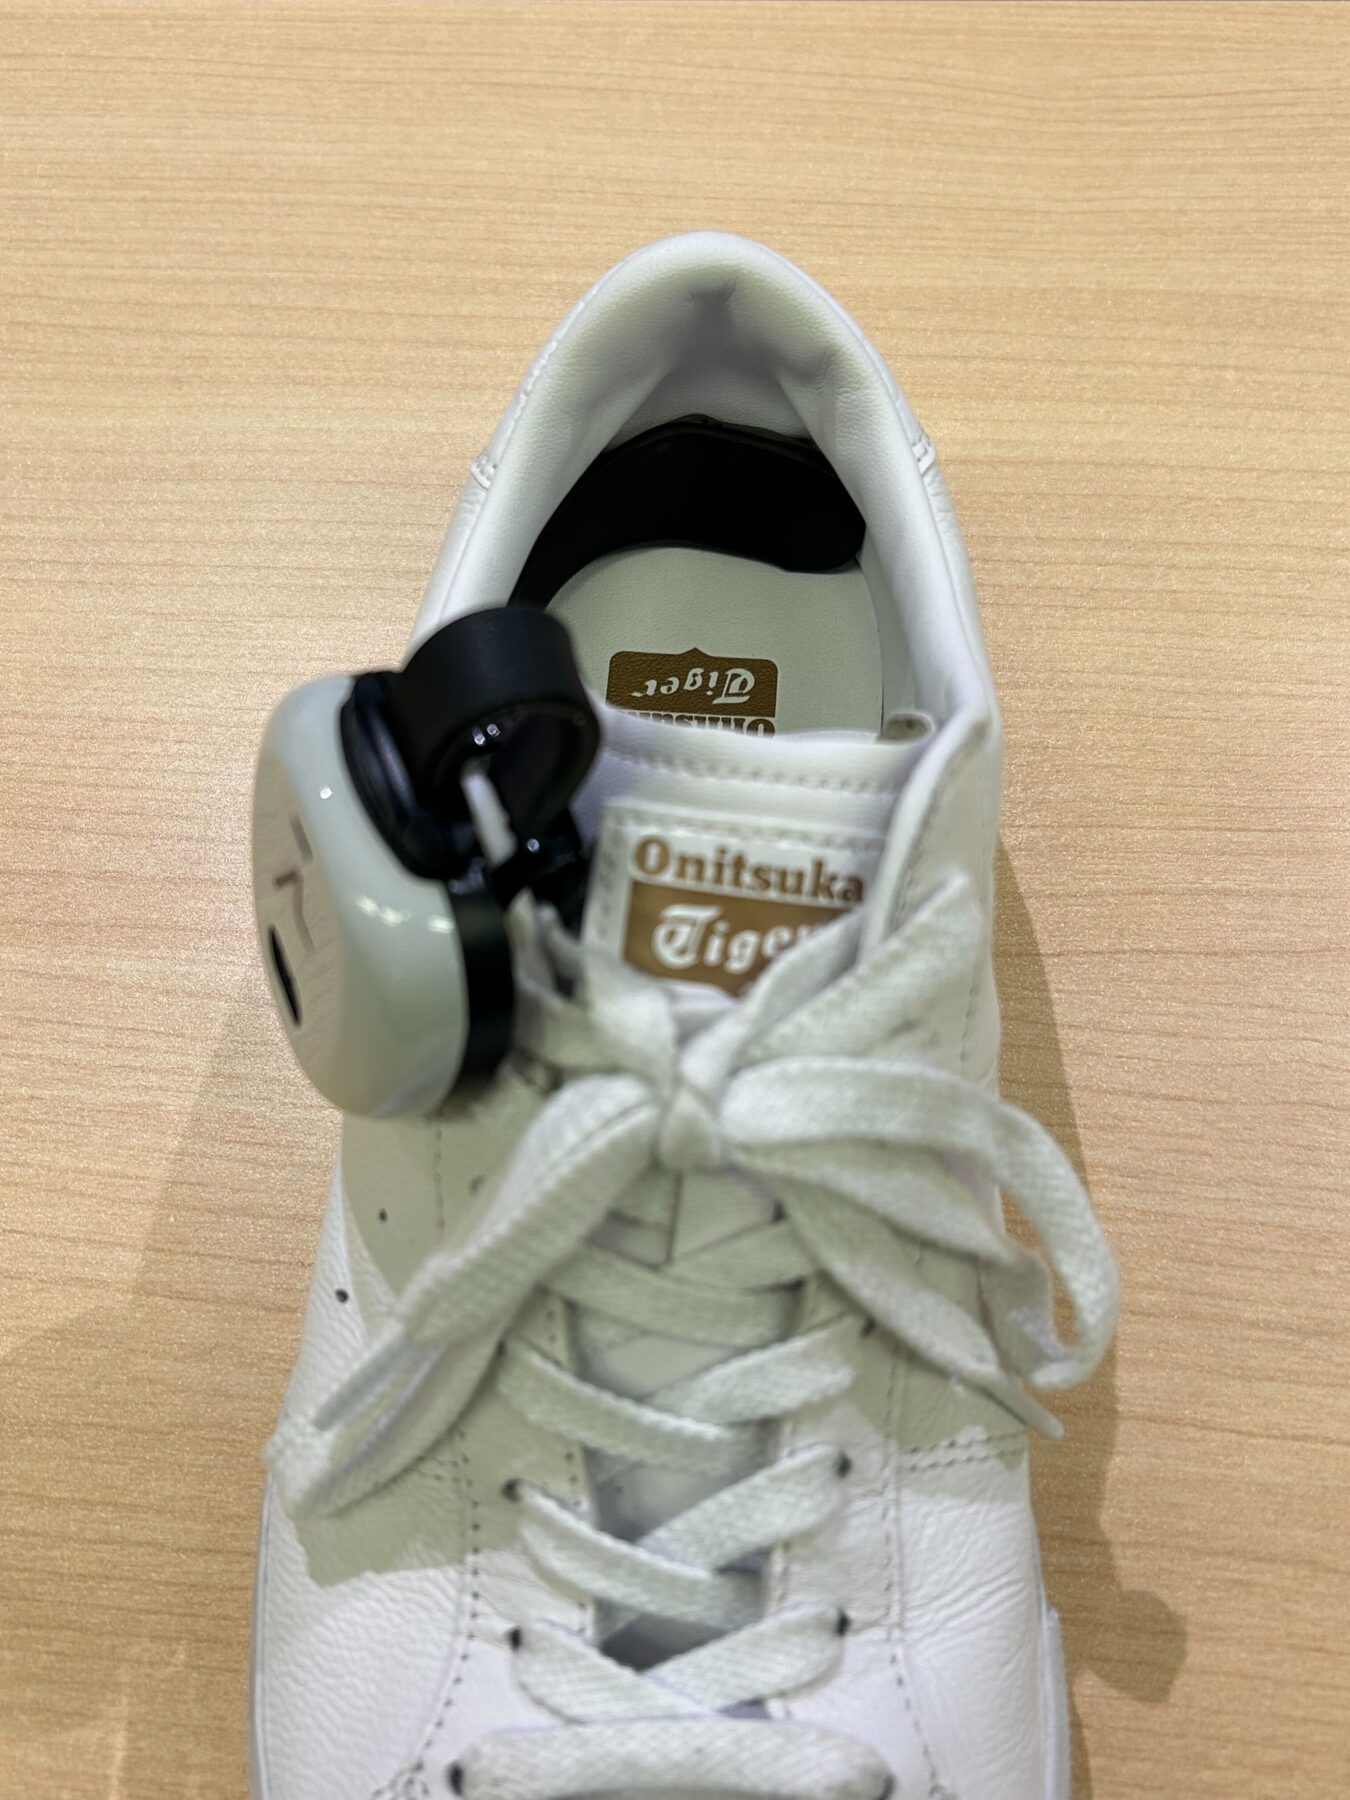
[Image showing side view of belt position]

If you feel discomfort when wearing the shoes or while walking, please try the following:
- Adjust the position of the device
- Loosen and re-tighten the shoelaces
- Wear shoes or socks made of soft, cushioned material
3. Preparation and Navigation Practice
Now, let’s introduce several ways to practice using ASHIRASE. Please try the practice methods that best suit you.
3-1. Understanding Vibrations in Tutorial Mode
ASHIRASE has six vibration patterns, with the most commonly used ones during navigation being: Direction Vibration, Forward Vibration, Arrival Vibration, and Vibration towards destination. Understanding what each vibration means and when they switch will help ensure smooth navigation.
You can experience the full navigation flow from “General Route Guidance” in the “Tutorial Mode” of the User Guide. You can try it indoors without actually walking outside, so we recommend first listening to the voice guidance to understand how the navigation works.
- Direction Vibration
This tells you which way to walk. When your walk starts, the device vibrates to show the first direction. At every turn, the device vibrates again to guide you. - Forward Vibration
This tells you to keep walking straight. Both devices will vibrate on the upper part. As you get close to a turn, the vibration gets faster. - Arrival Vibration
This means you have reached your destination. Both devices will give three long vibrations. This tells you the route is finished. - Vibration towards destination
This helps you find the exact location of your destination. It shows whether it is in front, behind, to the left, or to the right. You can turn this on using the ASHIRASE app or by tapping your feet.
3-2. Trying Navigation to a Nearby Destination
Once you feel more comfortable with the vibrations, try navigating to a nearby location. Follow these steps to set your destination.
[How to Set a Destination]
- Open the app and tap the “Destination Input” field at the top of the home screen.
- Enter the name of a nearby facility.
- Select your destination from the search results.
- Tap the “Start Navigation” button.
3-3. Practicing with Custom Routes using My Route
If you can’t find a suitable destination for practice, use the “My Route” feature. This feature allows you to record and save your own walking routes.
- Simply start recording at the starting point and stop at the destination to save it.
- You can repeat the same route in future practice sessions.
We recommend setting shorter practice routes, especially including turns, to experience Direction and Forward Vibrations.
For more details on setting up My Route, please check the My Route section.
Notes
If you’re not yet confident in walking alone, consider using the voice guidance during navigation or going out with a support person. If you have trouble reaching your destination or understanding the vibrations, feel free to contact us via the “Help” section in the app menu. We are here to support you in exploring new places!